



Guide
First Adult Tricycle Buying Guide
Choose your first adult tricycle by checking rider fit, storage, weight limits, gears, brakes, assembly, and service before buying.
We research everything we recommend. When you buy through our links, we may earn a commission. Learn more
Guide
Inspect tricycle reflectors in the loaded configuration, check obstruction and orientation, and distinguish passive visibility from active lighting.

Updated · 11 min read
Reflectors and reflective material are useful parts of a visibility arrangement, but they do not create their own light. Their effectiveness depends on incoming illumination, orientation, condition, and whether they are visible around the rider and cargo. On a trike, a wide rear assembly, low recumbent seat, basket, trailer, or canopy can change what another road user sees.
This guide explains how to inspect and document passive visibility equipment on the complete vehicle. It is separate from selecting headlights, using a flag, or deciding whether to ride at night. It does not certify legal compliance, guarantee detection by drivers, or prescribe a universal reflector pattern. The vehicle instructions and current local requirements should govern the final arrangement.
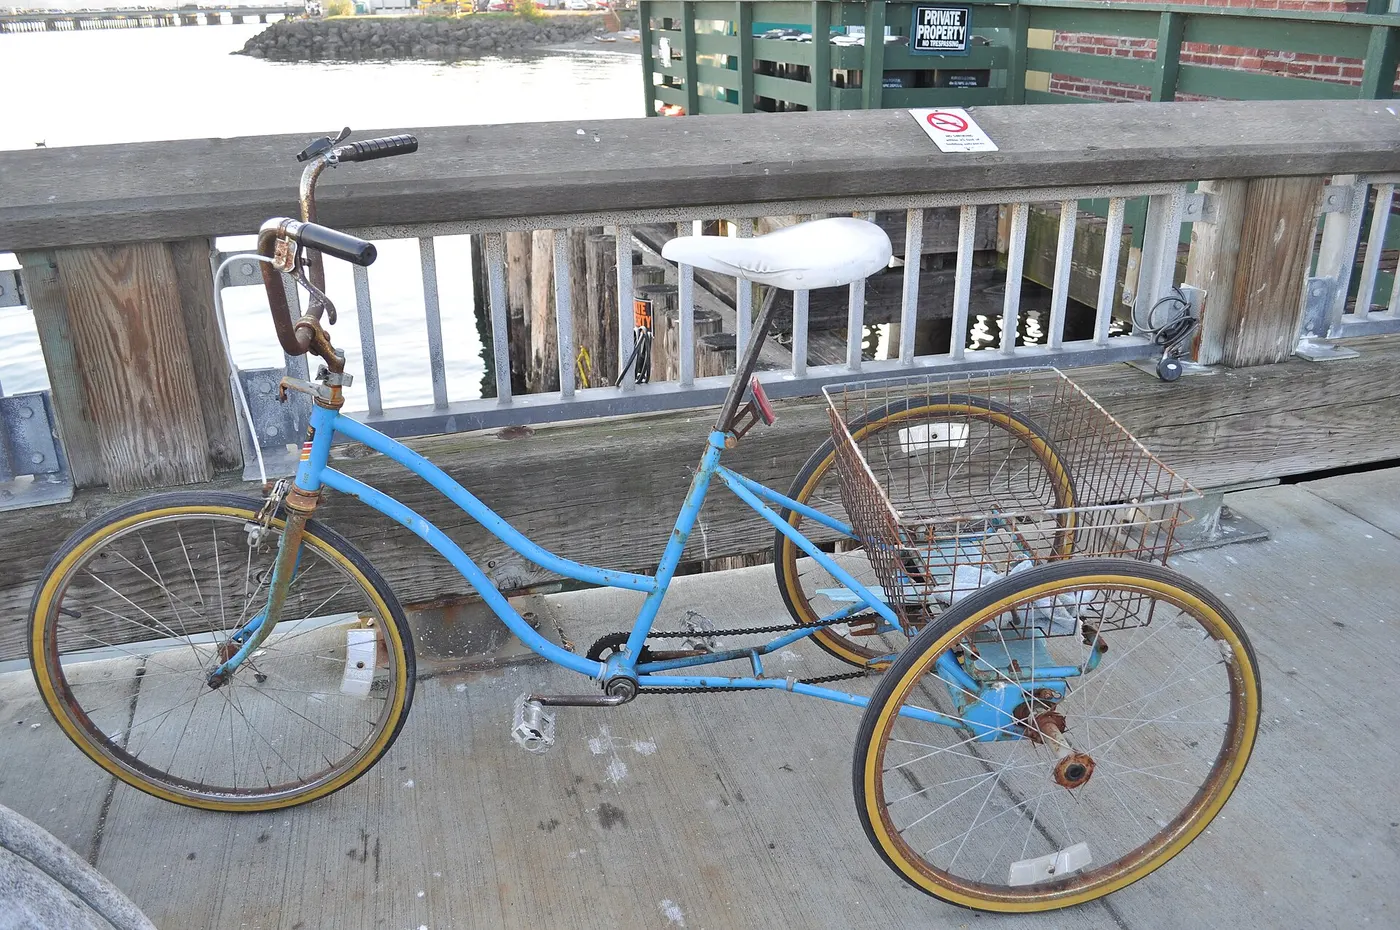
A lamp produces light; a reflector returns some incoming light toward its source. Reflective clothing and tape can provide additional passive elements when illuminated, but they are not replacements for required or suitable lights. A reflector cannot illuminate the road ahead for the rider. Keep these functions separate when choosing equipment and assessing a route.
NHTSA's bicycle-safety advice recommends a combination of visible clothing, reflective equipment, and front and rear lighting with reflectors when visibility is poor. That general advice supports using layers rather than treating one item as a complete solution. It does not establish the exact legal equipment for every location or the suitability of an individual trike arrangement.
The night riding lights guide addresses active lighting and route conditions. This article concentrates on the passive layer: whether the intended reflectors remain present, clean, properly oriented, and unobstructed. A complete check needs both pages' questions rather than choosing between a lamp and a reflector.
Start with the vehicle manual and the actual trike. Locate the factory reflectors and any reflective elements supplied with accessories. Note their positions and whether any have been removed, damaged, or covered. A product photograph can help identify an expected item, but the manual and installed configuration should resolve what belongs on your model.
Record front, rear, side, and wheel-related equipment separately. Do not assume a reflective tire stripe replaces a missing reflector unless the applicable instructions and requirements say so. Likewise, a rear light may or may not incorporate a reflector. Read the component description rather than judging its function from a red lens.
For a used vehicle, ask about changes and compare the installed equipment with its documented configuration. The used trike inspection guide covers the wider ownership check. A missing small component may be easy to overlook while assessing expensive features, yet it still deserves identification and the correct replacement.
Load the trike as you normally use it, within its permitted limits, and secure the cargo according to the relevant instructions. Then inspect the visibility equipment from several stationary viewing positions. An empty basket may reveal a rear reflector that a grocery bag covers completely. The normal trip arrangement is the useful one to assess.
Include coats, bag handles, liners, straps, locks, and other items that may hang over a light or reflector. A reflective patch on a bag does not automatically compensate for blocking the intended vehicle equipment. Reposition cargo through a permitted arrangement and recheck the complete setup rather than adding an unverified substitute.
The basket bag guide and pannier compatibility guide explain containment and fit. Visibility should be another criterion in that purchase, alongside attachment and clearance. An accessory that fits the rack can still obstruct equipment or change the way the rear of the trike is presented.
A reflector's mounting and orientation matter. Follow the component's intended installation rather than attaching it wherever a spare hole is available. A tilted or rotated bracket can point the reflector away from the intended direction. If the factory mount is damaged, obtain a suitable replacement rather than bending an unfamiliar part until it seems close enough.
Do not infer correct orientation from one flash photograph. The camera and light source create a particular viewing geometry that may not represent ordinary traffic. A bright response in that image is useful evidence that the material reflects in those conditions, but it is not a guarantee of visibility from all directions or distances.
Ask the maker or installer to resolve unclear mounting instructions. A trike's wide frame or low seat can create positions unlike those on an upright bicycle. Keep the component's purpose explicit: rearward, forward, or side presentation as documented. The correct part and location should be identified together.
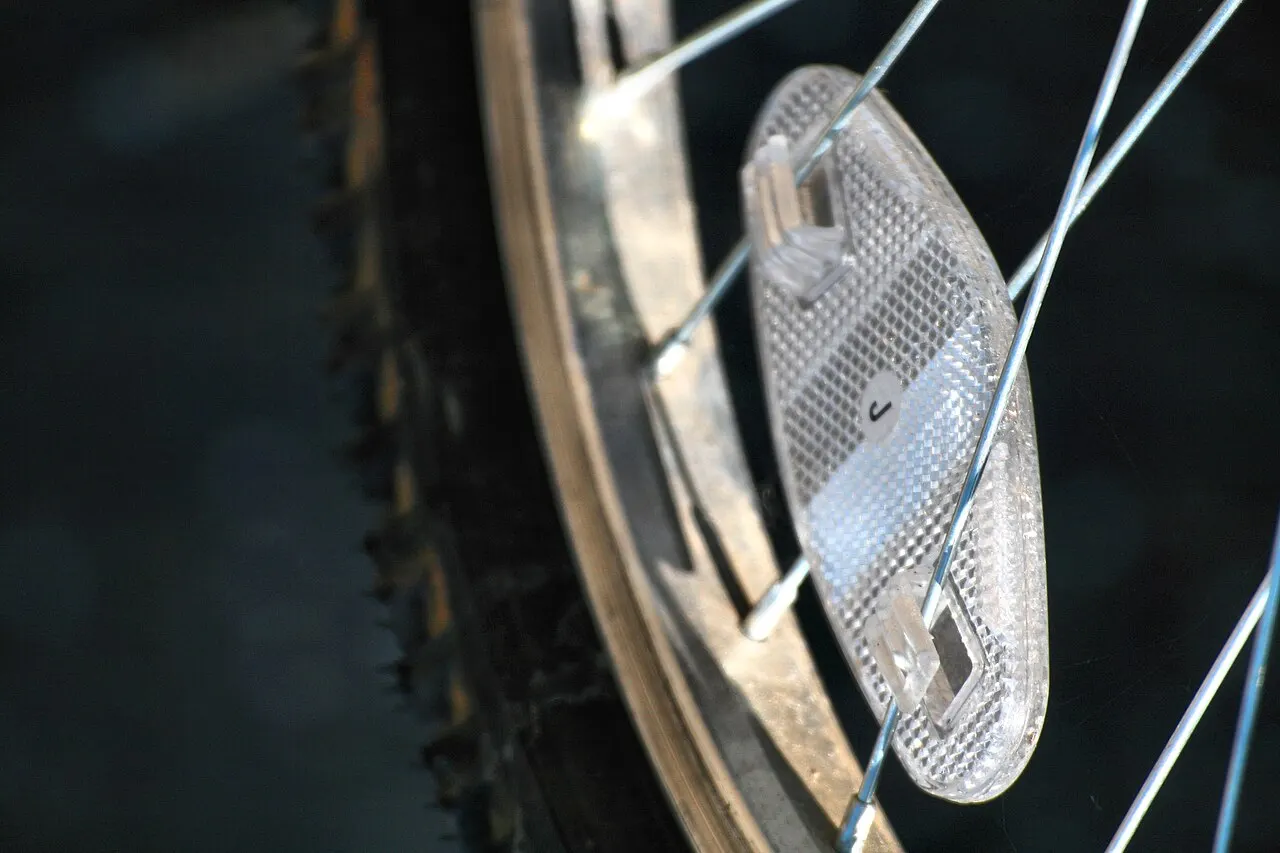
Look for cracks, missing sections, a loose mount, dirt, or a surface that has become obscured. Clean equipment using the permitted method and materials. A cloudy or damaged reflector may require replacement rather than stronger cleaning products. Do not scrape, sand, or polish it with an unapproved method in an attempt to restore brightness.
Reflective tape and fabric also have their own care requirements. Washing, abrasion, or damage can change their condition. Follow the accessory or garment instructions and replace unsuitable items through the appropriate process. Appearance in daylight is useful but cannot establish a precise nighttime performance value.
The washing guide covers separating cleaning tasks around sensitive equipment. Include reflectors in the routine without making them a reason to apply solvent near tires, brakes, or plastic parts. A clean setup should preserve the equipment, not trade visibility for damage elsewhere on the trike.
Local rules can specify equipment, colors, positions, or lighting use. Verify current requirements through the relevant government or responsible authority for the places you ride. A manufacturer's general safety advice and a retailer's road-legal claim do not necessarily answer your local question. This article intentionally avoids asserting one universal requirement for all adult tricycles.
Write down the jurisdiction and official source you checked, especially if the route crosses boundaries. If the trike's electric classification affects the rules, identify that classification through applicable official information. Do not assume that three wheels or a motor automatically places every model in the same category.
Practical visibility can require attention even when the documented equipment is present. A bag covering a reflector is still a problem to resolve. Conversely, adding decorative reflective material does not establish compliance if a required item is missing. Keep the two checks connected but distinct: the official requirement, and the actual unobstructed installation.
A vehicle approached from the side presents a different view from one approached from behind. Inspect the complete trike from both sides, including with cargo and accessories fitted. Ask whether the documented side or wheel equipment remains visible and correctly installed. Do not assume that a large rear reflector answers every direction of approach.
Reflective elements on moving parts may create a different appearance from those on a stationary frame, but this guide does not quantify detection benefits or prescribe a universal arrangement. Follow the intended equipment instructions and current rules. The important owner task is to identify missing, damaged, or obscured elements rather than inventing a performance claim.
At junctions, visibility also depends on sight lines, other vehicles, lighting, and rider position. Reflectors do not remove those constraints. The safe riding guide addresses route and traffic behavior. A passive visibility improvement should support those decisions rather than encourage use of a route that remains unsuitable.

A recumbent may place the rider and some equipment lower than an upright bicycle. Check the maker's intended light and reflector positions for that exact model. Do not attach a reflector to a convenient seat surface if it faces the wrong direction or is obscured by the rider. Low position is a reason for a model-specific arrangement, not a reason to improvise.
A flag is a different visibility element with its own mounting and clearance questions. The flag guide covers that topic. A flag does not illuminate the road or automatically replace a rear reflector, and a reflector does not provide the same elevated visual cue. Keep their functions clear when evaluating the whole arrangement.
If a headrest, bag, or seat adjustment changes the view of fitted equipment, recheck it in the normal riding position. A photograph made without the rider may miss an obstruction. Use a safe stationary demonstration with the person seated where appropriate, and avoid drawing conclusions about moving traffic performance from that single view.
A trailer extends the arrangement behind the trike and may obscure existing rear equipment. Read its instructions for reflectors, lights, flags, and mounting positions. Check the exact loaded trailer, not only the trike ahead of it. Equipment on the towing vehicle should not be assumed to cover every requirement of the trailer.
The trailer compatibility guide covers connection and operating questions. This page adds a visibility inventory for the additional section. Record which items belong to the trailer and which belong to the trike so a missing component is not overlooked during assembly or storage.
For pet equipment, preserve the intended ventilation, containment, and access while using the maker's visibility arrangement. The pet transport guide addresses that broader task. Do not drape a reflective cover across an enclosure without approval merely to increase visible area; it can change other important functions.
Supplementary material can be useful when it is designed for the surface and use, but it should not cover labels, joints, controls, inspection points, or existing equipment. Check adhesion and care requirements. A decorative strip that peels into a wheel or obscures a serial label creates a new problem rather than a complete improvement.
Do not apply material to braking surfaces, moving interfaces, or components whose instructions prohibit it. The location should remain compatible with cleaning, folding, servicing, and ordinary operation. If you are unsure whether the frame or accessory permits adhesive material, ask its maker before installation.
Select documented products from an identifiable supplier and keep their instructions. Avoid interpreting the word reflective as a guarantee of a particular performance or legal category. If a rule requires approved equipment, verify that requirement and the item's actual documentation. Supplementary decoration should remain supplementary in your record.

Reflective clothing or accessories can add passive elements, but their position changes with the rider and weather equipment. A backpack, rain jacket, or seated posture may cover a reflective area. Inspect the actual clothing arrangement rather than relying on the garment's promotional image. The rider's equipment and vehicle equipment should remain separately identified.
The clothing and clearance guide addresses loose fabric and drivetrain contact. Do not trade those clearances for a visible strip by wearing something that can enter the chain or wheel. Select suitable riding equipment and manage it through its intended use.
Clothing does not replace the vehicle's required lighting or reflectors. It also does not guarantee that another road user will detect or correctly interpret the trike. Keep claims modest and make route choices based on actual conditions. A layered arrangement supports visibility while leaving the normal need for careful riding intact.
A helper can look at the parked, loaded trike from front, rear, and sides in a safe location. Photograph any obstruction and the intended equipment positions. If using a light source to observe reflective response, keep the activity away from traffic and do not present the result as a certified performance test.
Record what the check actually established: an item was visible from a particular position, a bag covered it, or a mount was loose. Avoid claims about guaranteed detection at a distance unless supported by the relevant product testing and conditions. Ordinary owner observations are valuable without being converted into numerical safety promises.
Repeat the check after changing a rack, bag, canopy, trailer, or seat-related accessory. The canopy fit guide covers that installation's wider implications. A visibility arrangement can be correct before a modification and obstructed afterward, so the loaded configuration should remain the reference.
For a missing or damaged factory reflector, identify the intended replacement and mount. A generic product of the right color may not attach securely or face the correct direction. Ask whether the bracket, fasteners, and necessary hardware are included. Compare the package contents with the actual installation before opening or modifying the part.
If a shop supplies the replacement, ask it to preserve the vehicle's documented arrangement and note the installed part. If the original mount is no longer available, obtain a supported alternative rather than an improvised connection. The service guide helps organize that request.
Keep the purchase record and instructions with the trike file. This makes future replacement easier and distinguishes required equipment from supplementary additions. A complete record also helps another owner or technician understand why an item was placed in a particular location rather than treating it as arbitrary decoration.
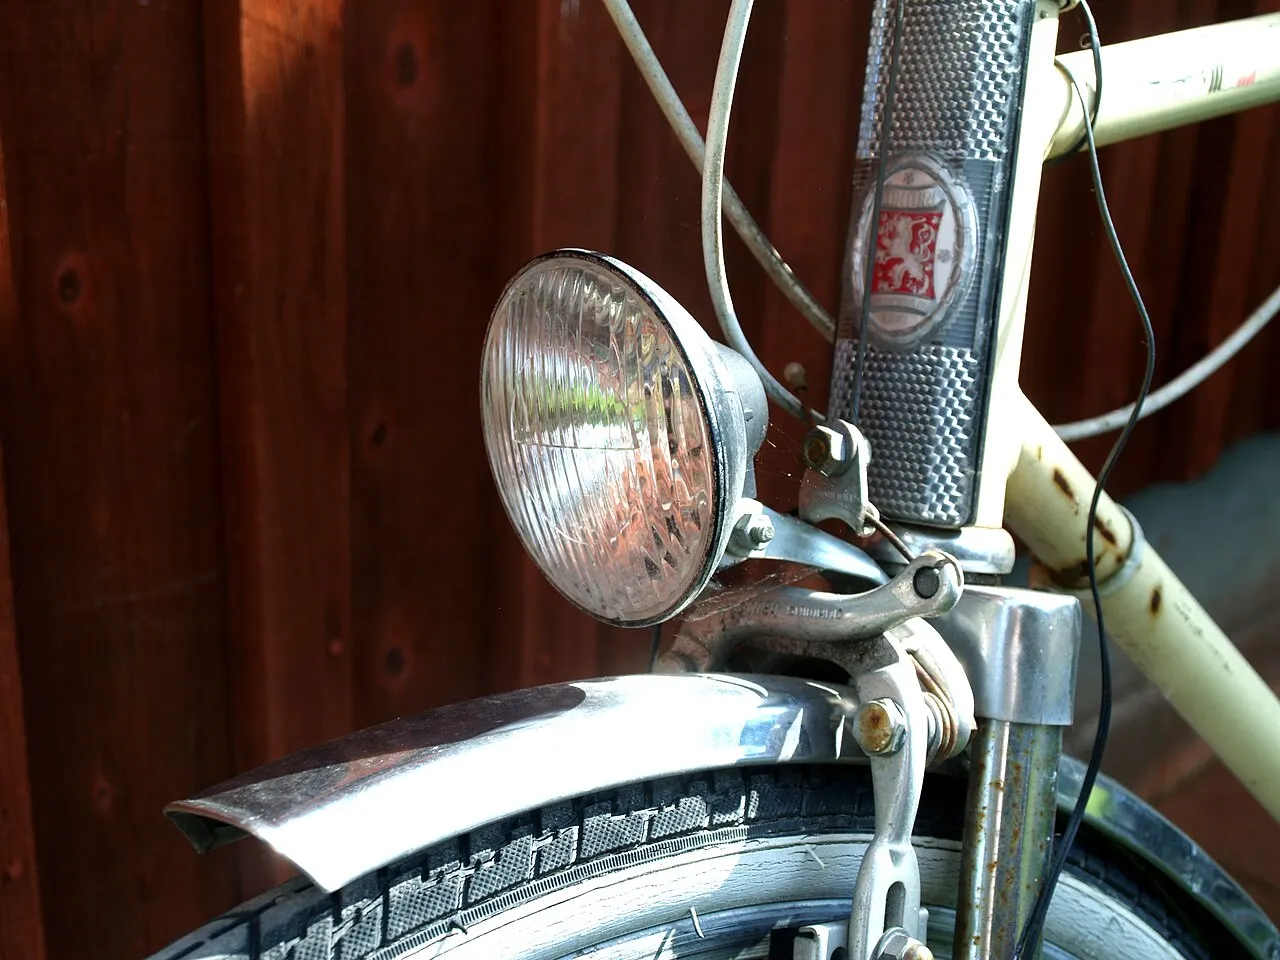
Imagine an upright trike whose rear reflector is clearly visible when the basket is empty. A full shopping bag then covers it and partly blocks a rear lamp. The owner does not assume that a reflective logo on the bag resolves the issue. Instead, the cargo arrangement is changed within the basket's permitted use and the complete setup is checked again.
If the obstruction cannot be resolved through ordinary loading, the owner asks the maker or installer about an approved equipment position. The decision remains tied to the real trike and load. It does not promise that moving a reflector to any convenient outer corner will satisfy its intended orientation or local rules.
A recumbent carrying a trailer follows the same principle but inventories the additional rear section separately. Both examples show why passive visibility is an ownership routine rather than a one-time accessory purchase. Small changes to cargo can undo an otherwise careful installation.
Add a brief visibility walk-around to the maintenance checklist and normal departure routine. Check presence, condition, orientation, and obstruction alongside the active lights. A familiar sequence makes small changes easier to notice without turning every trip into a technical experiment.
When conditions are unsuitable, equipment alone should not determine the decision to ride. Review the route, light, weather, and your own ability to operate the trike. Passive elements are one useful layer in that decision, not a guarantee that the complete trip is appropriate. Keeping their role clear makes the equipment record and the riding plan more dependable.
Research-based inspection guide, reviewed 14 October 2026. No legal compliance certification, optical performance test, or guaranteed detection distance is claimed.
Guide
Choose your first adult tricycle by checking rider fit, storage, weight limits, gears, brakes, assembly, and service before buying.

Guide
Learn how to compare adult electric tricycles for control, fit, batteries, braking, transport, and ownership support.

Guide
Understand the leg and hip muscles used when pedaling a tricycle, plus how fit, resistance, and electric assistance change the effort.