



Guide
First Adult Tricycle Buying Guide
Choose your first adult tricycle by checking rider fit, storage, weight limits, gears, brakes, assembly, and service before buying.
We research everything we recommend. When you buy through our links, we may earn a commission. Learn more
Guide
Plan trike phone and GPS mounting around device compatibility, control clearance, stopped navigation, secure retention, and approved charging.

Updated · 12 min read
A navigation mount should hold the device through its intended use while preserving the rider's view and control access. It is not enough that the clamp fits a bar or that a phone snaps into place. Adult tricycles can have crowded upright bars, under-seat steering, baskets, folding joints, and different sight lines.
This guide covers compatibility and a practical navigation routine. It does not recommend operating menus while moving, connecting unapproved electrical accessories, or treating a mount as a guarantee that a phone will survive every impact. Follow the exact device, case, mount, and vehicle instructions.

Record the phone or GPS model, case, size, and whether the mount uses a dedicated interface or a clamp. A case can alter dimensions, button access, and attachment. Similar device names may cover different generations.
Identify the ordinary task: a visible route cue, recording a trip, or a stopped navigation reference. The mount should serve that task without encouraging prolonged screen attention. Do not buy a large display simply to compensate for an unfamiliar route.
The commuting guide and overnight touring guide explain preparation and alternatives. Route planning should happen before departure rather than become continuous menu work on the tricycle.
A device case, adapter, mount head, arm, clamp, and vehicle can each have compatibility requirements. Check the exact combination and approved materials. A universal adhesive adapter may not be appropriate for every surface or case.
Use manufacturer guidance rather than transferring a review from another phone. Quad Lock's cycling support separates handlebar, out-front, stem-cap, and other products, illustrating that mounting style is a system choice.
Do not modify a case or drill a component to force engagement. If the combination is unsupported, choose another approved arrangement. The accessory guide provides the complete compatibility framework.
Confirm clamp diameter, shape, straight length, and material. A tube that looks cylindrical can be tapered or unsuitable for the proposed clamp. Ask the vehicle maker when structural permission is unclear.
Check available space beside levers, shifters, throttle, mirrors, and other equipment. A clamp fitting physically does not prove the rider retains a normal grip. Do not relocate brake hardware without its approved procedure just to make room.
Recumbent accessory masts or steering handles can require model-specific hardware. Use the actual trike and rider during a trial rather than copying a conventional bicycle setup.
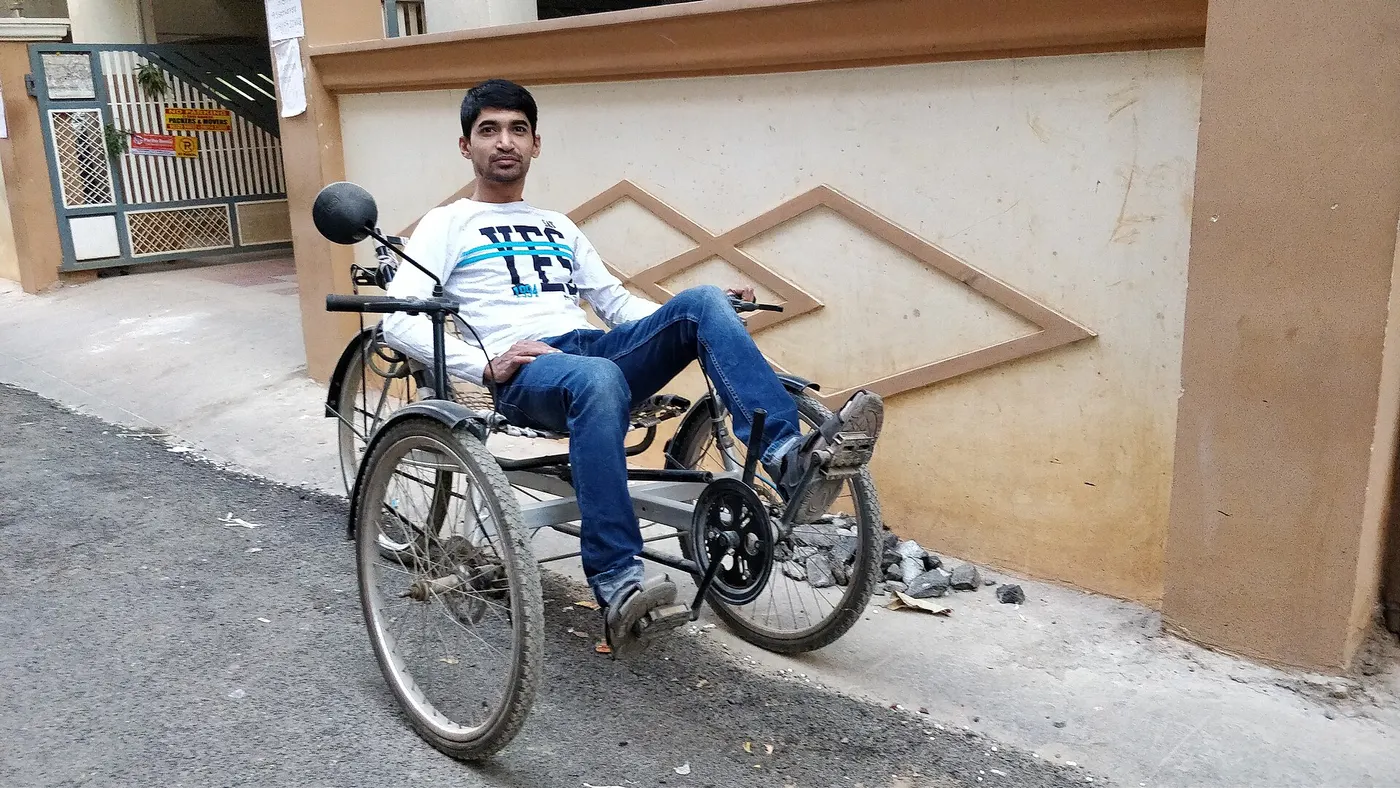
Sit in the fitted riding position and wear expected helmet and eyewear. Check whether a brief glance is possible without stretching, twisting, or losing a comfortable control grip. The display should not obstruct the route ahead.
Avoid positioning that reflects a bright lamp or requires a long look downward. A larger screen can be readable while still distracting. Choose a layout that supports short cues and stopped interaction.
The fit guide addresses the wider posture. If a mount changes reach or observation, revise the arrangement rather than accepting the compromise because the device looks convenient.
Operate the prescribed stationary control checks through permitted steering movement. Inspect the device and arm for contact with basket, frame, cables, and the rider. A long out-front mount can swing into a space that is clear straight ahead.
Keep brake lever travel and throttle return unobstructed. Test with gloves and normal hand position. A corner of the phone can interfere even when the clamp is away from the lever.
The brake guide explains the functions to preserve. Accurate clamp tightening cannot make a physically obstructive position acceptable.
Follow the mount's exact engagement and verification instructions. A click, twist, latch, or strap can have a specific final check. Do not assume every device uses the same retention method or that apparent alignment proves full engagement.
Practice removal with the vehicle secured and keep the device clear of wheel and control areas. If the mechanism is awkward for the rider's grip or reach, assess another compatible format.
Use a tether only where the device and mount makers approve it and route it clear of moving parts. An improvised cord can create another snag risk without fixing an unsupported primary attachment.
Read the phone, case, GPS, and mount limitations. A vehicle permitted in light rain does not establish that an open device connector or third-party case is suitable. Avoid translating water-resistant marketing into a universal weather guarantee.
A cover can affect touch operation, screen visibility, heat, and cable access. Use an approved compatible arrangement and stop to make adjustments. Do not keep riding with a fogged or unreadable screen merely because the route is already loaded.
The rain guide covers the vehicle and clothing. Device protection and navigation fallback remain separate tasks within that plan.
Ask what the mount or damping accessory is intended for and which combinations it supports. A statement about motorcycle mounting does not automatically establish a bicycle or tricycle arrangement. Use exact cycling guidance from the provider.
Do not claim that a mount protects every camera or electronic component under all conditions. Product design, device, surface, and use can differ. A personal short ride does not establish long-term damage resistance.
If the device or mount shows abnormal movement, damage, or unreliable retention, stop and correct the setup through its instructions. More clamp force or an added homemade pad is not a universal solution.
If the accessory uses vehicle power, obtain exact-model approval for electrical connection, routing, and operation. A compatible-looking connector or voltage label is insufficient. Do not splice wiring or bypass protections to keep a phone charged.
For a separate portable power source, follow its and the device's instructions and secure it within the vehicle's limits. Keep cables away from steering and moving parts. A loose battery pack dangling from a handlebar is not a finished arrangement.
The battery-care guide concerns the main system, not permission for accessory wiring. Resolve the complete arrangement before relying on it for a long trip.

Prepare the route and alternatives before leaving. Use suitable simple cues while riding and stop at a permitted safe location before complex changes. Do not explore menus through a junction, turn, or cross-slope.
Maps can show paths without confirming current gates, surfaces, or tricycle access. The clearance guide explains what needs physical verification. A route line should not override an unsuitable barrier or closed entrance.
Keep a fallback that does not depend entirely on one charged device or connection. The appropriate format depends on the trip; a broad overview and essential contacts can be useful without prescribing a particular app or paid service.
Configure the device before riding so ordinary notifications do not create repeated demands for attention. Recording a ride does not require monitoring the screen continuously. Keep the observation task ahead of a statistic or message.
If a call or route change matters, stop in a suitable place and secure the tricycle before interacting. Do not hold the phone in one hand while relying on the other to manage the vehicle through traffic.
A mount makes the device available, not every use appropriate. The safe-riding guide provides the base routine for predictable movement and stopping.
Check whether the device or mount must be removed before folding or transport. A protruding arm can catch a hinge, cover, or carrier strap. Follow both mount and vehicle instructions and restore the operating setup before riding.
Remove valuable detachable equipment when practical and permitted during parking. The locking guide covers the complete routine. A strong clamp is not a theft-security claim.
Store the removed device and parts securely. Do not leave a mount head or adapter loose where it can be lost or struck during transport. The next ride should begin with identifiable complete components.
Use the same device, case, rider, clothing, and vehicle configuration for an appropriate stationary or controlled trial. Record installation, view, reach, retention, and clearance. Do not rank safety from a attractive cockpit photograph.
Ask about current return conditions before altering a grip or case. A mount that requires irreversible modification should not be purchased as a casual fit experiment. Keep the original approved parts where needed for restoration.
The ownership-cost guide helps include case, adapter, installation, and any required service in the comparison. A bare mount price may not describe the complete usable system.
| Area | Evidence needed |
|---|---|
| Device | Exact phone/GPS and case interface |
| Mount | Approved head, arm, clamp, and materials |
| Vehicle | Suitable structural location and dimensions |
| Function | Normal posture, brief view, controls, and retention |
| Conditions | Weather, vibration scope, and power arrangement |
| Routine | Stopped navigation, parking, folding, and fallback |
The useful setup supports a prepared route without compromising control. Keep claims tied to the actual compatible combination and do not describe it as permission for continuous screen interaction.
A device mount is useful only if it supports a sensible navigation routine. Before choosing hardware, decide whether you need a map for occasional checks, recorded route data, or a dedicated cycling computer. These uses have different implications for screen size, device weight, power, and interaction. A large phone can show more map detail while occupying more of the control area. A small dedicated device may reduce that footprint but still needs compatible mounting and a plan for interpreting directions.
Prepare the route before moving. Review difficult junctions, path width, access restrictions, and places where a trike may need a different choice from an ordinary bicycle. A navigation application can produce a route without accounting for your vehicle's width, local classification, or practical turning space. Treat the proposed route as something to check, not as permission to enter every suggested path. Keep an alternative stopping place in mind so a missed turn does not become an urgent screen task.
Set up the display and any permitted audio guidance while stationary. Notifications, route recalculation, and incoming calls can compete with attention even when the device is firmly mounted. Arrange the settings according to the device and application's instructions before the trip. If something unexpected appears, find a safe place to stop and deal with it there. A mount removes the need to hold a device; it does not remove the attention required to operate it.
The attachment chain includes the device, case or adapter, locking interface, mount body, clamp or base, and mounting surface. Compatibility at one link does not establish the rest. A phone case that fits your handset may still be incompatible with a different generation of mount. A universal adapter may require a particular surface and application method. Follow the maker's instructions for the exact components instead of mixing parts because they appear to engage.
Read restrictions involving materials, dimensions, weight, environmental exposure, and required accessories. Cases change the device's shape, and an attached wallet, battery pack, or other item can alter the intended fit. Check whether those items are allowed in the mounted configuration. A secure fit with the bare phone does not prove the same arrangement works with additions. For a dedicated GPS, verify the manufacturer-approved interface and retention procedure rather than assuming a familiar quarter-turn shape is universally interchangeable.
Inspect the mounting surface independently. A clamp intended for a cylindrical handlebar may not fit an unusual recumbent control, a tapered section, or a component that the trike maker does not permit to carry accessories. If an adapter is needed, obtain approval for that exact combination. Do not mount to a brake cable, a light bracket of unknown capacity, or another convenient item simply because it is within reach. Choose a documented location that remains clear through the required movement checks.
Check the device orientation while stationary in the normal riding position. A location that looks clear from above may cover the display, a shifter, or part of the rider's sight line. A recumbent rider's viewing angle differs from an upright rider's angle, and a mount between handlebars can interfere with movement or entry. Verify access for mounting and dismounting as well as for riding. Screen readability should not require an awkward posture or a longer glance than the information deserves.
Follow the mount's engagement and release procedure, then use its prescribed check for secure attachment. A device that feels present in the interface may not be fully locked. Learn the intended feedback and do not infer successful engagement from the photograph of a similar mount. If a secondary tether is specified or permitted, fit it in a way that cannot reach moving parts or controls. A tether is not permission to use an insecure or incompatible main attachment.
Assess vibration and device protection through the relevant makers' guidance. This article does not test camera stabilization, shock resistance, or the performance of any damping accessory. If your phone maker or mount maker identifies a concern, resolve it before choosing the setup. Do not treat every advertised vibration accessory as a universal solution. The exact handset, mounting system, trike, and operating conditions are necessary context for an informed answer.
First decide whether the device's own battery can support the planned trip, using its instructions and your observed use. Screen brightness, navigation, temperature, and other functions can change consumption, so avoid relying on a generic claim of all-day operation. Carry an appropriate backup navigation method and a plan to stop if power becomes insufficient. For a first trip, choose a route where a device failure does not create an urgent need to navigate while moving.
If using external power, obtain permission for the source and connection. An electric trike battery is not automatically an approved supply for phone charging, and a connector that physically fits does not establish electrical compatibility. Use only the outputs, adapters, and cable arrangements allowed by the relevant manufacturers. Do not modify wiring or bypass a protection feature to support an accessory. Where the trike has no approved output, consider an independent permitted power source instead.
Route every permitted cable through its instructions and inspect clearance throughout normal steering movement. Leave neither a tight cable that pulls a connector nor a loose loop that can reach a wheel or lever. Check weather restrictions for the device, power source, ports, and mount separately. A weather-resistant case does not certify a connected charging port for rain. Stop and disconnect or change the arrangement through the applicable instructions if moisture, damage, or unusual heat makes the setup questionable.
Before leaving, check the mount's condition, its engagement, control clearance, and route preparation. At a stop, reassess any movement, rattling, or changed device angle. Resolve the cause rather than making adjustments while rolling. At arrival, remove and store the device through its instructions and consider the theft exposure of anything left on the trike. A secure mounting interface designed for riding should not be mistaken for an anti-theft lock.
Keep a record of the exact case, mount, adapter, and location. When the handset, case, control layout, or accessory arrangement changes, reassess the chain rather than carrying over the previous fit conclusion. This makes replacement purchases easier and prevents an old compatibility answer from being applied to new hardware. The best setup is one that preserves control access, permits clear stopped navigation, and can be installed and checked consistently without adding an unresolved electrical or attention problem.
Research-based guide; no mount retention, vibration, device-damage, or road-navigation testing was performed.
Guide
Choose your first adult tricycle by checking rider fit, storage, weight limits, gears, brakes, assembly, and service before buying.

Guide
Learn how to compare adult electric tricycles for control, fit, batteries, braking, transport, and ownership support.

Guide
Understand the leg and hip muscles used when pedaling a tricycle, plus how fit, resistance, and electric assistance change the effort.