



Guide
First Adult Tricycle Buying Guide
Choose your first adult tricycle by checking rider fit, storage, weight limits, gears, brakes, assembly, and service before buying.
We research everything we recommend. When you buy through our links, we may earn a commission. Learn more
Guide
Care for a recumbent mesh seat through exact identification, fabric and frame inspection, permitted cleaning, tension instructions, and replacement fit.

Updated · 11 min read
A recumbent mesh seat is an assembly, not just a piece of washable fabric. Its frame, mounting points, straps or tension system, seams, accessories, and actual seat material work together. Care should begin with the exact seat identity and instructions. A routine borrowed from a garden chair or another recumbent can miss important restrictions.
This guide explains how to organize seat inspection, obtain the right cleaning procedure, and prepare a replacement or service inquiry. It does not prescribe a universal tension or adjustment. The upright-versus-recumbent guide covers the broader riding-position choice; here the focus is keeping an installed seat in its intended condition.

Record the trike model and year, seat model, size, and revision where documented. A manufacturer can offer different seats on the same frame, and a previous owner may have changed the configuration. A mesh-looking surface alone does not establish the material, mounting method, or permitted care. Obtain the relevant manual or ask the maker to identify the installed seat from clear photographs and markings.
Distinguish the main seat cover from removable cushions, headrest pads, bags, and rain covers. They can have different materials and care instructions. A pad described as washable does not authorize washing the whole assembled seat the same way. Likewise, a protective cover is not necessarily suitable to sit on while riding. Check the exact item and intended use rather than transferring instructions from a visually similar accessory.
HP Velotechnik's current Delta tx product information, for example, distinguishes ErgoMesh and ErgoMesh Premium choices. That demonstrates why seat names matter; it does not establish the care method for every seat in those families or every revision. Use the exact manual and support response for your equipment. AZUB's support resources similarly distinguish seat selection and setup questions from generic frame identification.
Look at the accessible fabric, seams, attachment points, tension system, frame, and mounting hardware through the maker's instructions. Note tears, fraying, displaced straps, damaged buckles, abnormal movement, or other changes. Photograph an issue before cleaning where it helps explain the original condition. Do not label a seat structurally sound because the cloth looks intact from one angle.
Check whether the seat remains in the documented configuration. A shifted strap, altered recline position, or moved accessory can change support and access. Do not compensate for damaged fabric by tightening the remaining straps. Increased tension is not a general repair. If the assembly is abnormal or cannot be secured through its procedure, stop using it and seek the relevant assessment.
Separate comfort observations from material diagnosis. A different feeling can follow a changed setup, accessory, clothing, or component condition. Record when the change began and what preceded it. Avoid declaring stretched mesh or a broken frame solely from discomfort. A clear description lets a fitter or technician investigate the actual assembly rather than inherit a guessed explanation.
Read the seat and accessory instructions for removal, cleaner, temperature where specified, rinsing, drying, and reinstallation. Do not assume machine washing is acceptable because the fabric resembles clothing. Some seat documents prohibit it. Other removable items may have their own permitted hand-washing routine. Resolve the exact distinction before separating fabric from the frame.
Choose a cleaner only after material compatibility is established. A general bicycle degreaser, outdoor-fabric spray, or household stain remover is not automatically suitable for seat mesh, webbing, coatings, foam, or neighboring components. Follow dilution and application instructions and avoid mixing products. If a stain remains after the permitted method, ask the maker rather than escalating to abrasives or stronger chemicals.
Consider what sits near the cleaning area. Fluid can reach frame joints, brakes, wiring, bags, or other parts even when the intended target is fabric. Follow the complete trike's restrictions as well as the seat's care procedure. The washing and cleaning-kit guide explains how to separate tools and materials across the vehicle.
Use the drying method specified for the exact material and assembly. Do not assume that a dryer, heater, strong sun, or forced air is permissible because it is convenient. A fabric surface that appears dry does not necessarily establish the condition of pads, seams, bags, or concealed areas. Follow the required routine before reinstallation or storage.
Plan a suitable drying location in advance. A damp seat placed immediately under a cover can remain in an unsuitable condition, while an exposed outdoor location may conflict with the maker's environmental guidance. The cover and condensation guide addresses that separate storage decision. Avoid turning a protective cover into a method for hiding an unfinished drying step.
After drying, inspect again and restore only through the prescribed process. Keep track of removed parts and orientation. Do not rely on memory when multiple straps or fittings look similar. If the procedure includes fastening, tension, clearance, or mounting checks, complete them before use. A clean seat is not ready merely because it has been reattached somewhere on the frame.
A tension system can affect the seat's support, but the adjustment method depends on the design. Read whether adjustment is an owner task, which elements are adjustable, and how the finished condition is checked. Do not apply a universal rule such as tightening until the mesh feels firm. That description does not identify the intended shape, loading, strap sequence, or limits.
Check component condition before adjustment. A worn buckle, damaged webbing, torn seam, or altered mounting point can prevent the system from retaining its intended configuration. Adjusting around the damage may temporarily change how the seat feels without correcting the problem. Seek replacement or service through the maker's guidance instead of adding knots, extra ties, or improvised reinforcement.
If the adjustment changes seat position or support, reassess related fit through the trike procedure. Pedal reach, control access, headrest placement, and mounting or dismounting can depend on the seat configuration. A small-looking change should not be considered isolated automatically. The fit guide provides the broader context, while the exact recumbent instructions determine the work.
The seat frame and attachment points require their own inspection. A cover without visible damage can still be attached to an abnormal frame or loose mounting assembly. Look only within the permitted owner scope and obtain service for cracks, distortion, abnormal movement, damaged hardware, or an unresolved securing issue. Do not straighten a frame or substitute hardware because the fabric replacement looks easy.
Use the exact fastening specification and required joint condition where work is permitted. A general bicycle torque chart does not establish the value for an unidentified seat mount. The torque-wrench guide explains why the source, units, procedure, and tool all matter. More tightening is not a reliable response to a recurring loose joint.
Report movement accurately to the service provider. Describe which part moves, under what permitted observation, and when it began. Do not reproduce a questionable condition by riding repeatedly. Clear photographs of the mount and whole seat can help identify the assembly. The repair-shop guide explains how to prepare that request before transporting a wide recumbent.
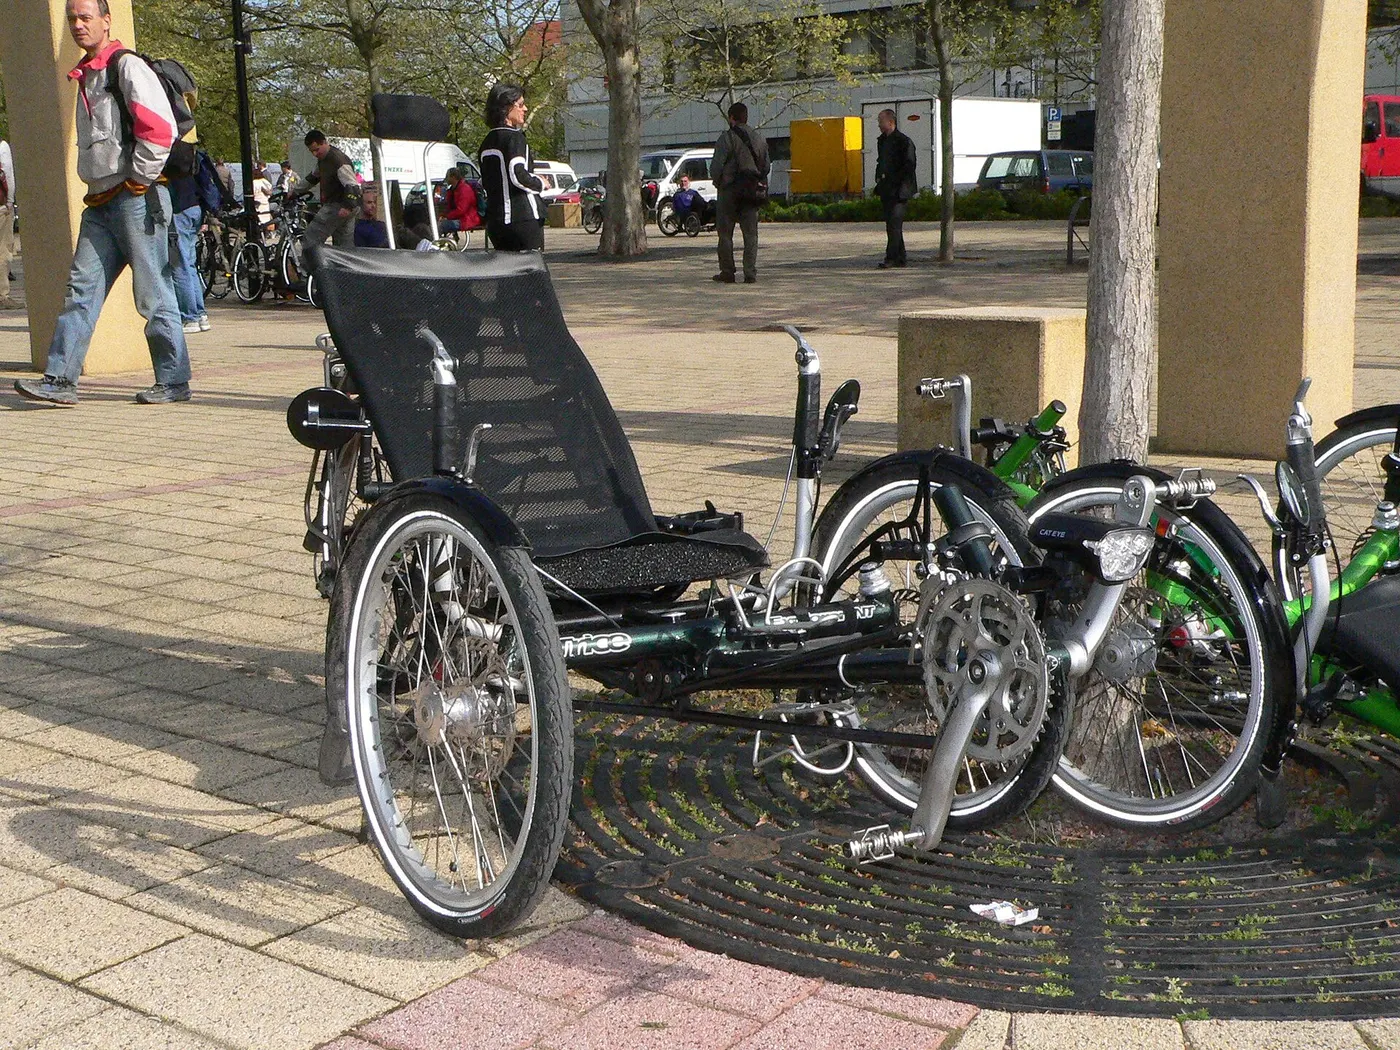
A bag attached behind the seat can occupy mounting points or affect access. A cushion can alter support and rider position. A headrest has its own fitting and care requirements. Confirm compatibility for the exact seat and trike rather than assuming every accessory labeled recumbent is suitable. Ask which points may carry the accessory and what limits or restrictions apply.
Check clearance in the intended configurations. Accessories can approach wheels, steering, suspension, folding joints, or transport restraints. Loose straps require their prescribed securement and should not reach moving parts. If folding or seat removal is part of normal storage, determine whether the accessory must be removed and how that task is performed. One riding photograph cannot establish all those arrangements.
Do not use an extra cushion to disguise an unresolved fit or structural concern. If discomfort persists, ask for a suitable fitting assessment and, where relevant, qualified health advice. This article makes no clinical claim about pressure relief or back treatment. A compatible accessory may be useful, but its purchase should follow identification of the actual task it is intended to address.
If the cover or assembly needs replacement, send the maker or authorized seller the exact seat identity, size, trike model, and photographs of the attachment system. State whether you need only the fabric, a strap or buckle, mounting hardware, or a complete seat. A generic request for mesh for a trike can produce an item that looks appropriate but does not fit the assembly.
Ask whether the proposed part matches the revision and whether installation is within owner scope. Obtain the procedure before ordering if it affects your ability to complete the job. Include required tools, hardware, and any post-installation checks in the cost comparison. A low fabric price does not represent the complete replacement if additional components or professional work are needed.
Confirm the return and ordering details from the actual supplier. Custom sizes, special orders, or installed fabric can have different terms. This guide does not promise that every seat part is returnable or available. Keep the quote and compatibility answer with the maintenance record so future replacement decisions do not begin with the same identification uncertainty.

Imagine the rider notices a different supported position after the trike has been transported. Begin by recording the observation and checking whether the seat and attachments remain in the documented configuration. Look for visible displacement or damage through the instructions. Do not immediately tighten every strap to make the seat feel familiar again; the transport event may have affected another part of the assembly.
If the maker's procedure permits a specific tension adjustment and the components are sound, follow that exact method and complete its checks. If condition or instructions remain uncertain, ask a suitable provider to assess the seat. Report the transport method and any previous adjustments honestly. An accurate history is more useful than asking the technician to fix stretched mesh when the material diagnosis has not been established.
After authorized work, reassess pedal reach and control access in the intended position. Complete the required pre-ride and post-service checks. If the concern persists, stop and follow up with the provider rather than adding an unapproved cushion or tie. The scenario illustrates a service sequence; it does not identify the cause of any particular seat complaint.
Record the seat identity, relevant instructions, cleaning products used where permitted, replacements, and significant configuration changes. You do not need to document every ordinary wipe as a technical report. Focus on details that will help explain future condition or identify the correct part. Keep unresolved concerns visible, especially where different people ride, clean, and arrange service.
Use the manufacturer's inspection and maintenance guidance rather than inventing a universal calendar interval for mesh replacement. Actual condition and the documented requirements matter. A seat stored carefully still needs the required checks after a long pause in use; the return-from-storage guide covers that broader vehicle assessment.
A practical mesh-seat routine keeps fabric care, tension, frame condition, accessories, and rider fit connected without treating them as interchangeable. Identify the assembly, use its own procedure, and obtain assessment when the condition is abnormal. That makes replacement and maintenance more reliable than choosing a fabric or tightening method by appearance.
A replacement fabric cover may preserve the original frame and mounting system when it is the specified part and installed correctly. A complete seat replacement can change more of the configuration, including support, position, accessories, and the relationship to the trike. Ask exactly which item is being quoted. A product photo of an assembled seat may accompany a listing that includes only one component.
For a complete change, establish approval for the frame and revision, the required mounting parts, and the setup procedure. Do not assume that a seat from the same maker is interchangeable merely because its mounting points look similar. The proposed arrangement must be assessed as a complete system. Keep any model exclusions and required adapters in the purchase record rather than relying on memory at installation.
After an approved change, repeat the relevant fitting and clearance checks. A new supported position can affect pedal reach, control access, entry, and nearby bags or mounts. Do not carry over the old fit conclusion without reassessment. If the change was intended to address discomfort, record what was actually assessed and obtain qualified advice where needed rather than promising a clinical outcome from the new seat.
A seat bag, rain cover, or cushion can hide fabric condition, straps, or attachment points. Follow the permitted removal process so required inspections remain possible. Do not mark a concealed seam or fitting as satisfactory because the accessory looks neat. If removal is difficult or requires service, include that recurring task in the ownership plan.
Check the accessory's own attachment and care requirements at the same time. A bag using seat bosses has a different role from a fabric pocket tied to the cover. Combining them can affect access even if each item is independently compatible. Ask about the complete arrangement when the instructions do not resolve shared points or clearance.
Restore the documented configuration after inspection. Keep loose closures secured and verify that an accessory has not altered tension or obstructed a mounting point. A photograph can help identify an obvious displacement, but the actual procedure remains the authority for setup. Reassess whenever the accessory, seat position, or transport routine changes.
Before buying, ask whether the maker supplies the required fabric, straps, buckles, and mounting parts for your revision. Confirm how those parts are identified and whether owner replacement is permitted. A seat that is comfortable in a demo can still be inconvenient to maintain if its replacement components cannot be obtained through a clear process.
Include care effort and installation support in the comparison. If a replacement requires a shop, obtain the relevant quote and appointment information. If a fabric item has a specific drying routine, consider whether your storage space supports it. These are practical ownership questions, not reasons to reject every specialized seat. They help you choose a configuration whose maintenance is as workable as its initial fit.
Research-based inspection and ownership guide. No seat material, cleaner, tension setting, or clinical effect was tested. No universal wash temperature or tension is prescribed.
Guide
Choose your first adult tricycle by checking rider fit, storage, weight limits, gears, brakes, assembly, and service before buying.

Guide
Learn how to compare adult electric tricycles for control, fit, batteries, braking, transport, and ownership support.

Guide
Understand the leg and hip muscles used when pedaling a tricycle, plus how fit, resistance, and electric assistance change the effort.