



Guide
First Adult Tricycle Buying Guide
Choose your first adult tricycle by checking rider fit, storage, weight limits, gears, brakes, assembly, and service before buying.
We research everything we recommend. When you buy through our links, we may earn a commission. Learn more
Guide
Fit adult trike grips and bar ends around handlebar dimensions, controls, end treatment, rider position, fastening, care and complete movement.

Updated · 11 min read
A grip or bar-end accessory must fit the actual handlebar and preserve reliable control access. Diameter, usable straight length, clamp requirements, bar material, shifter arrangement, end treatment and rider position all matter. A product that slides onto a bar is not automatically compatible with the complete trike cockpit.
Begin with the exact vehicle and the task you want to solve, such as a worn grip, an uncomfortable hand position or an alternative approved handhold. This guide organizes selection and fitting questions without diagnosing hand symptoms or prescribing a universal grip angle. The accessory guide explains the wider mounting process.
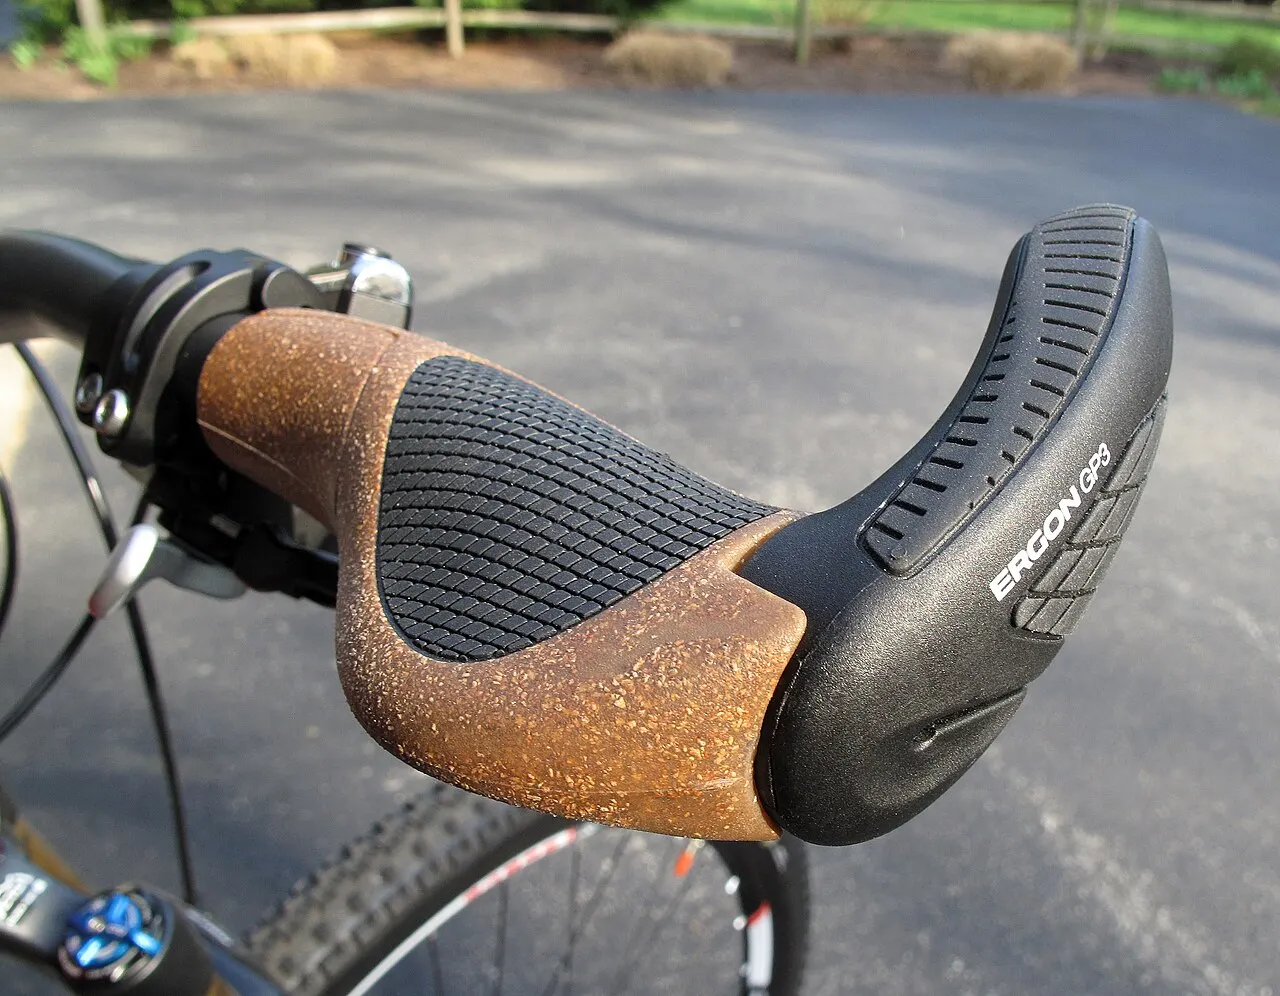
Record the handlebar identity and material where documented, grip model, shifters, brake levers, parking control, motor controls and mounted accessories. Photograph the arrangement for identification. A recumbent steering bar can differ substantially from a conventional upright handlebar, and a previous owner may have changed the original parts.
Identify which surfaces and dimensions the proposed grip maker requires. Usable straight length is not necessarily the full visible bar section. Taper, bends, control clamps or other fittings can limit the appropriate location. Do not move a required control casually to create space before establishing the complete configuration.
Check whether the existing grips are full length, shortened for a twist shifter or another specified type. A pair can have different requirements on each side. Buying two identical grips by appearance may not solve the actual task. Obtain the relevant component references rather than assuming all bicycle grips are interchangeable.
Different grips use different retention and installation procedures. A clamped design requires the specified mounting and fastening, while another type can have its own preparation and care restrictions. Read the actual product instructions instead of copying a method from a different mechanism.
Ergon's installation article discusses screw-clamped grips and practical rotation adjustment in a bicycle context. Use it as evidence that the exact product and fitted position matter. Its generic support suggestions are not a trike handling procedure, and values from an older model manual are not universal clamp specifications.
Do not apply an arbitrary adhesive, lubricant or household solvent to make installation easier. Material and retention compatibility need the actual instructions. A chemical that seemed useful on another grip can affect the current product or nearby components. If the required method is unclear, obtain support before beginning.
Confirm that brake, shifting and parking controls remain usable through their intended movement. A grip wing or bar end can occupy more space than the old cylindrical grip. A rider may be able to touch a lever yet struggle to operate it in the normal position. Assess the actual arrangement while stationary and secured appropriately.
Twist shifters and other controls can require specific grip versions and spacing. Do not trim an unapproved product or alter a control to fit a purchase. The hub-versus-derailleur guide explains that control type is a separate practical choice from the gearing mechanism.
Include gloves and ordinary layers. A cuff or glove can change access and movement. The clothing guide supports that stationary preparation. A grip fitted successfully without the intended clothing should not automatically be treated as verified for every layer used later.

Have the base seat or saddle and controls set through the vehicle's fitting instructions. A grip adjustment around an unsuitable base posture can give a misleading result. State the practical observation: reach, pressure, rotation difficulty or interference. Do not diagnose a clinical cause from a product description or photograph.
Follow the grip maker's positioning and checking method for the actual product. An ergonomic label does not provide one angle for every upright or recumbent rider. If the setup remains uncomfortable or a health concern affects suitability, obtain appropriate fitting and qualified advice separately.
Record a controlled trial honestly. A short stationary assessment or dealer ride can identify a practical issue but does not establish long-distance comfort or treatment of numbness. The test-ride guide helps preserve those evidence limits while making the next useful step clear.
A bar-end feature can be integrated with a grip or installed as another component. Read the exact handlebar permission, attachment and use instructions. Do not assume every bar can accept a clamped extension or every grip model can gain a different bar end. Product families can have specific compatible parts and exclusions.
Check how an alternative hand position affects access to essential controls. This article does not prescribe a riding technique that sacrifices required control. Learn the intended operation and suitable use through the exact vehicle and accessory guidance. A photograph of someone holding an extension does not establish that routine for your trike.
Verify movement and clearance from rider, seat, cables, frame and nearby accessories. A recumbent's steering position can make an extension behave differently from an upright bicycle example. If the complete geometry is unresolved, choose a documented alternative rather than forcing an attractive accessory into the cockpit.
Follow the bar, grip and accessory instructions for end caps or plugs. Do not leave an intended cap absent because another part appears to cover the opening. An integrated accessory can have its own required closure and installation. Identify what the complete system specifies rather than treating the end as a decorative detail.
If a mirror or other item mounts at the bar end, confirm the full combination. Shared space and hardware can create a compatibility issue even where each product is suitable independently. Do not remove required parts or add an arbitrary spacer to make both items fit. Ask the relevant makers about the exact arrangement.
After work, inspect retention and required closure through the instructions. A finished-looking cockpit does not prove every part is secure. Keep the mirror guide and the grip procedure separate but coordinated so observation equipment remains in its intended condition.
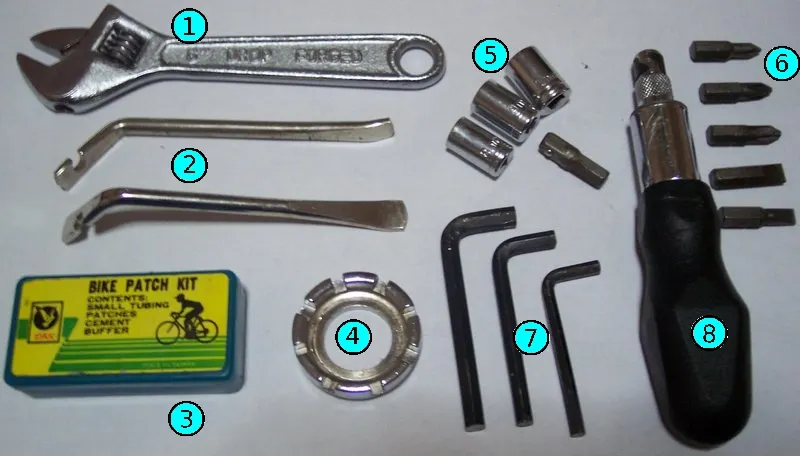
Where a clamp is fitted, identify the required hardware, units, joint condition and tool. Do not borrow a value from another Ergon grip or a generic bicycle table. A screw's size is not the whole specification. Follow both the handlebar and accessory restrictions, obtaining clarification if they do not resolve the combination.
The torque-wrench guide explains why more force is not a general cure for movement. A worn, incompatible or damaged arrangement can remain unsuitable even when tightened harder. Stop if the required condition cannot be achieved and have the assembly assessed.
If installation is outside owner scope, obtain a suitable provider and give it the complete cockpit inventory. A shop can then assess connected controls and accessories rather than only the purchased grip. The repair-shop guide helps establish accepted work before moving a wide or heavy vehicle.
Follow the required steering and cable-clearance checks with the full grip and bar-end arrangement installed. A part can fit on a straight section while contacting another component during movement. Include the rider's entry and exit routine and any permitted folding configuration.
Do not test interference by an abrupt turn during riding. Establish the required stationary and post-work checks first. If a procedure cannot be completed safely with your equipment, obtain assessment. A gap that looks adequate in one photograph is not a measurement of every permitted movement.
For transport, determine whether the accessory needs removal or adjustment and how it is restored. The folding-hinge guide and carrier guide cover connected ownership tasks. Riding fit should not silently become a transport fit approval.
List what the current setup does well and what actually needs improvement. A worn retention surface, control-access problem and subjective comfort preference are different issues. An expensive ergonomic replacement should not be used to conceal an abnormal handlebar or loose control assembly.
Check current sizes, versions and supplier terms before ordering. A model family can include variations for different shifters or mounting arrangements. Keep the exact item reference and written compatibility answer. A broad title such as adult bike grip does not establish fit for a specific recumbent bar.
Include fitting, installation and future replacement parts in the cost comparison. Obtain current quotes rather than inventing universal savings from a premium grip. A useful affiliate recommendation identifies the scenario and verified compatibility boundaries without promising clinical benefit or effortless control for every senior.
Record handlebar, usable mounting dimensions, controls, proposed grip and bar end, end treatment, rider observation, installation and unresolved items. Mark evidence sources so a physical observation is not mistaken for manufacturer approval.
| Item | Required answer |
|---|---|
| Surface | Approved material, shape, diameter and usable length |
| Controls | Exact shifters, brake access and shared accessories |
| Product | Correct version, retention and required closure |
| Fit | Practical stationary operation in the intended posture |
| Routine | Movement, care, folding, transport and refitting |
Use photographs to explain geometry where a listing is incomplete. Ask a precise question about the combination instead of whether the product fits tricycles generally. Retain the answer and reassess affected points after a cockpit change.

Imagine an owner wants larger grips but one side shares space with a twist shifter. Identify the exact control and the compatible grip version before purchase. Measure through the seller's requested method and confirm the handlebar surface and required clearance. Do not cut a full-length grip by guesswork to mimic a shorter model.
Have the complete setup installed and checked through its instructions. Reassess brake and parking access with intended gloves. If the desired product cannot satisfy the configuration, choose another supported option rather than moving essential controls into an unsuitable position. The example illustrates a fit decision, not approval of any particular grip.
Inspect through the maker's routine, clean with compatible methods and address abnormal rotation or damaged parts before use. Retain product identity and significant work. If the handlebar, controls, mirror or clothing setup changes, repeat the relevant fit and clearance checks.
Grips and bar ends are most useful when they support reliable operation within a documented cockpit. Start with the actual surface and controls, resolve complete fit, and judge preference within that suitable arrangement. An attractive shape or ergonomic name is only the start of the buying question.
Record the required bar diameter, straight uninterrupted mounting length and any side-specific requirement from the actual instructions. Do not replace those measurements with the overall handlebar width or the visible gap between accessories. A taper, bend or control clamp can change the usable surface even where the bar looks approximately straight. Photograph the complete area so a supplier can identify which dimension remains unresolved.
Check both sides independently. A twist shifter, parking feature or motor control can make the available arrangement asymmetric. A product pair can also contain different versions for that reason. Obtain the exact model rather than ordering by hand size alone. A grip that suits the rider's preference still needs enough approved surface and reliable retention on the installed bar.
Keep the measurement method with the compatibility answer. If another control is moved or replaced later, revisit the affected fit rather than assuming the old reply covers the new cockpit. This makes a small replacement decision concrete without requiring the owner to infer every specification from a photograph. The useful comparison includes rider position and the physical requirements together.
Replacing a specified worn grip through its procedure can be a different task from changing shape, length or hand position. State which task you are commissioning. A same-model replacement may preserve the documented arrangement, while a new design can require more control and movement assessment. Do not describe every purchase as a simple swap when its envelope or retention differs.
If the original part rotates abnormally, inspect through the actual instructions and have condition assessed where necessary. Do not assume a larger replacement will repair an unknown handlebar or clamp concern. A product can feel secure during one stationary observation while the underlying compatibility or damage question remains unanswered.
For a redesign, identify the practical improvement sought and the connected checks. Better access to one function should not compromise another. Ask the provider to preserve the complete brake, parking, shifting and observation routine. The final record should identify what was changed and what was assessed rather than a broad claim that the cockpit became ergonomic.
Read the grip, handlebar and nearby component care instructions separately. A frame cleaner or adhesive solvent is not automatically suitable for grip material or retention. Do not apply a product simply because it removes a sticky mark quickly. If the permitted method does not resolve the observed condition, ask the maker rather than escalating to an aggressive chemical.
Inspect required caps, clamp parts and surfaces through their routine after cleaning or removal. A neat-looking assembly does not establish retained condition. If damage or abnormal movement is present, keep the issue unresolved and obtain the specified response. Cleaning should not become a way to conceal a condition before a fitting or service appointment.
For shared users, keep care supplies and instructions identifiable. Another person should not use a chain cloth or unapproved treatment on a grip by habit. A simple separated kit and current product record make maintenance more reliable than an assortment of unidentified cleaners. The actual component guidance remains the authority for material care.
When gloves, mirror hardware, a phone mount or another cockpit item changes, repeat the relevant stationary access and clearance checks. The original grip fit may remain suitable, but the shared space can differ. Do not discover a conflict through repeated adjustments while moving. Resolve the complete arrangement before relying on the trip routine.
If an approved adjustment is needed, follow its securing and verification method. Keep the changed position and relevant source in the record. An approximate visual return after transport is not necessarily the documented setup. This is particularly useful where the trike is folded or handled by someone other than the rider.
Judge the result by the actual task completed. The rider can operate the required controls from the intended position, the accessory combination is supported and the checks are complete. That is useful evidence without claiming a clinical outcome or universal comfort. A configuration-specific conclusion serves an affiliate reader better than calling one grip ideal for every adult tricycle.
Research-based fit guide. No grip, torque, hand-force, comfort duration or clinical outcome was tested. No universal angle or clamp value is prescribed.
Guide
Choose your first adult tricycle by checking rider fit, storage, weight limits, gears, brakes, assembly, and service before buying.

Guide
Learn how to compare adult electric tricycles for control, fit, batteries, braking, transport, and ownership support.

Guide
Understand the leg and hip muscles used when pedaling a tricycle, plus how fit, resistance, and electric assistance change the effort.